Written by Charlee Smith, BSI Glue Pro and National Sales Manager
Saturday
was a warm, very dark night. My wife Sandee had gone downstairs to try to coax
our cat Frankie into coming inside for the night so that
he’d be safe from prowling coyotes. As Frankie came in
the door, she turned off the porch light, which turned the
house pitch black. Sandee
headed for the light switch at the foot of the stairs, but
her arm hit something that created a horrible “bull in a
china closet” sound that could only be bad news.
Turning on
a light, she discovered to her horror that she had knocked
over her precious collection of Russian cups and saucers. The floor was now
covered with a layer of jagged, broken porcelain. Her treasures were
now history. That
darn cat!


Daylight
revealed not all was lost. Three of the cups and one saucer had absorbed the
fall without a scratch. I
felt that the one broken cup and one saucer would be
relatively easy to repair. The second saucer had a chance, but the third one,
sitting there shattered into 17 pieces, almost went
directly into the trash can. But hey, I’m one of the BSI Glue Pros. Our glues can make
the impossible, possible.
Years ago a raccoon greeted us as we entered our
home after being away for a few days (he got in through
the cat door). In
trying to coax him out an open door, the raccoon jumped
upon Sandee’s teacart, shattering more of her porcelain
and ceramic collection. One
of these was a tea pot, broken into 8 pieces. Since I was able to
repair that, I felt that the 17 piece saucer may have a
chance, but I wouldn’t have bet money on it.
The secret
to repairing objects such as these is to assemble as many
pieces as possible without using any glue, relying on
small sections of masking tape to keep the parts together.I started with the
tea cup.

In repairs
like this, if the pieces are glued together one at a time,
the final pieces of the puzzle will rarely fit correctly. Any errors in
alignment in the first pieces, however minor, throw off
everything else. As
the final pieces are added with the no glue method, the
sections of tape on the first pieces can be removed, if
necessary, for minor adjustments and then put back into
place.
What looks
like a perfect fit in many cases won’t be. Perfection can only
be confirmed by feel, not sight. Running your finger
across a seam will detect the slightest misalignment. If your finger senses
that the joint is as smooth as the glossy surfaces around
it, then it is perfect and can be held in place with tape
on its backside. At
this point, you must ensure you are working with clean
hands. Any trace
of dirt or oil on your finger will be transferred to the
non-glazed porcelain as you slide it across a misaligned
joint. With white
porcelain or ceramic, this will make it impossible for the
repaired crack to virtually disappear, which is possible
when these steps are done correctly.

After all
the pieces are perfectly aligned, the glue is then
applied. BSI’s
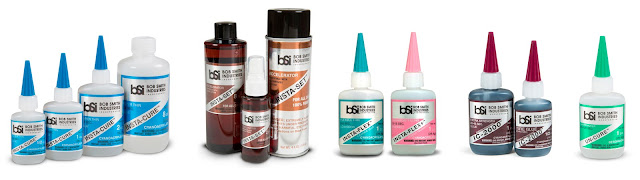
Insta-Cure super thin CA (Super Glue) has amazing penetrating
properties. When
applied to even an almost invisible crack, capillary
action will fully coat the interior of a joint and go
through to the other side. For this reason you must be careful how you hold
the object being repaired, since the CA can appear in
unexpected places and glue your fingers to the project. This is the reason I
prefer to spray the entire repair project with our
Insta-Set accelerator after all the thin CA is applied. While not necessary
for a strong finished product, the Insta-Set allows me to
immediately go to the next steps without bonding my skin
to the porcelain.
The handle
of the subject cup was set in place with the cup in an
orientation that allowed only gravity to hold the handle
in the correct position. One
drop of the Insta-Cure was applied to each end and it was
done.
For precise application of the Insta-Cure, BSI’s #302 extra
fine extender tip or #305 capillary tubing should be used
at the end of the nozzle (the #302 can be added to the end
of the #304 extender tip if you are using a Pocket CA
bottle). The CA is
applied to the side opposite of where the tape has been
placed. Inevitably,
you may find that there are puddles of the thin CA where
you don’t want them. The
corners of a paper towel should be used to soak up this
excess CA. This
still leaves a thin coat of the CA on the surfaces, but
this is taken care of in the next step.

After the
masking tape has been removed, the excess CA on the
porcelain can be removed using BSI’s Un-Cure debonder. This step is much
easier if done immediately after the repair. Cyanoacrylate becomes
much harder to dissolve after it has cured longer than 30
minutes. Small
sections of paper towels should be soaked in the Un-Cure
and vigorously rubbed on the glue joints. This can take from 30
second to a few minutes for each area, depending on the
thickness of the cured CA. Your opposite hand should be used to push against
the opposite side of thinner porcelain when the rubbing
force is being applied.
Thicker
amounts of CA can be sliced or scraped with a single-edge
razor blade, with Un-Cure used to remove the thin layer
that is left. Sometimes
using your fingernail to scrape the surface can speed up
the process. Areas
where the CA has penetrated the masking tape are the most
difficult to remove, so patience is an important factor in
this process. Care
should be observed by washing your hands at least every
five minutes, or by using a latex gloves or their
equivalent. The
dissolved CA gets soaked into the paper towel so don’t
hesitate to use more fresh towels than you may have
anticipated.
This
process does not affect the CA that is forming the bond in
the cracks (the object would have to be soaked in Un-Cure
or acetone for several hours for this to happen). Acetone (or fingernail
polish remover) can be substituted for the Un-Cure in this
process but it has a much higher evaporation rate, which
slows down the whole procedure.

This
saucer was repaired using the same process. The missing section
had become little more than dust when the plate shattered,
so this is the one obvious flaw in the repair, like the
small chips in the lip of the cup. There is a procedure
that can be used to fill these areas in, but that will
have to be a subject for another time.
When done
correctly, the cracks are nearly invisible.
Now for
the “impossible” one. The
five major pieces were put together and then glued, using
the procedures above. The
CA was put on no closer than 1” from the unrepaired areas. The non-glazed areas
of the broken parts must not see any glue before they are
assembled and taped in place.
All but
the last two fragments are now in place. These two required
more patience since the tape will not work for holding
them perfectly in place (trust me on this one). Like the handle on
the cup, you should rely on gravity to hold them in place. It may take a dozen
or more tries to get them positioned just right at the
same time, but once they are, they get the first drops of
the Insta-Cure to hold them in place. Then you apply the CA
to all the other joints.
Once the
tape is removed and the Un-Cure does the cleanup, the
saucer, to most eyes, will look undamaged.
While a
significant amount of their monetary value has been lost,
the Russian cups and saucers are ready to be displayed
once more. Happy days are here again! Like Mighty Mouse, I came to save the day. Women like that.
FYI: The
Insta-Cure that I used for the repairs is
over two years old. Although this goes
against the advise we give consumers, it has been open for
over a year in my garage, which has exposed it to many days over 90 degrees F. The bottle of Un-Cure is
over five years old. I think this makes a statement about the quality of BSI’s adhesives.